If you’re new to using a drill, it can seem overwhelming at first. But fear not! We’re here to guide you through the process with these five simple steps. Whether you’re a DIY enthusiast or a professional, mastering the art of drilling is essential for any project. So let’s dive in and discover the key steps to using a drill effectively.
Understanding Each Part of the Drill
Before we jump into the step-by-step process, let’s familiarize ourselves with the components of a standard power drill.
The Chuck: The chuck holds the drill bit in place. It adjusts to different sizes to accommodate various bits, ensuring a secure fit.
The Trigger: The trigger controls the speed at which you drill. Apply pressure for faster drilling and release pressure for slower drilling.
The Reverse Switch: The reverse switch is useful for drilling in opposite directions and extracting screws and materials.
The Drill Bits: Drill bits are essential for creating holes in different materials. Choose the right bit for the specific material you are working with.
Step 1: Choose the Right Drill Bit
Before you begin drilling, consider the material you’ll be working with. Different materials require different types of drill bits to achieve the best results. Here are some commonly used drill bits:
- Multi-purpose drill bits: These versatile bits come in a range of sizes and can handle metal, wood, and stone.
- Auger drill bits: Perfect for wood, these bits have a sharp spur, providing precise and neat edges.
- Spade drill bits: Designed for drilling large holes quickly, these bits are ideal for cutting into timber posts.
By selecting the appropriate drill bit for the job, you can ensure accurate and clean cuts.
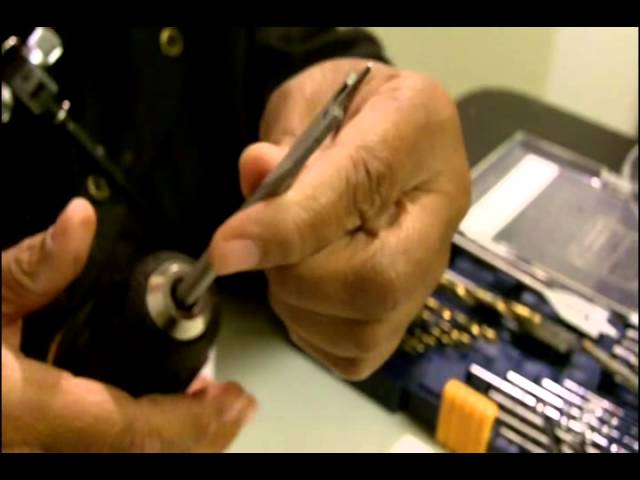
Step 2: Insert the Bit into the Drill
Once you’ve chosen the right drill bit, it’s time to insert it into the drill. Follow these steps for a secure fit:
- Twist the chuck counterclockwise to widen it.
- Place the smooth part of the bit into the hole.
- Tighten the chuck by twisting it clockwise until the drill bit is firmly secured.
Remember to hold the drill chuck and not the drill bit itself to avoid injuries.
Step 3: Prepare the Materials
To ensure precise cuts, it’s crucial to prepare your materials properly. Follow these tips:
- Clamp the material securely to prevent movement.
- Measure and mark the exact location where you want to drill.
- Use a pen or create a small dimple using a center punch and hammer to guide the drill bit.
Always prioritize safety and use clamps to hold the workpiece, avoiding any risk of injury.
Step 4: Adjust the Settings
Before you start drilling, double-check your drill settings to match the task at hand:
- High speed and low torque for drilling through metal or concrete.
- Lower speed for drilling into wood or plastic.
Keep the drill moving while in contact with the material to prevent overheating or stripping screws.
Step 5: Drill and Examine the Hole
Now it’s time to drill! Follow these steps for a smooth drilling experience:
- Place the drill bit on your mark and ensure it won’t be obstructed by wires or pipes.
- Squeeze the trigger gently, starting with slow speed and gradually increasing pressure.
- Maintain a firm grip on the drill while guiding it into the hole.
- After drilling, deburr the area for metal or remove wood shavings to examine the hole.
Congratulations! You’ve successfully used a drill to create a hole. Now you’re ready to tackle your next project.
FAQs
Q: Can I use the same drill bit for different materials?
A: While some drill bits are designed for versatile use, it’s generally best to use specific bits for each material to achieve the best results.
Q: What safety precautions should I take when using a drill?
A: Always wear protective eyewear and gloves. Ensure the work area is clear of any hazards, and keep your fingers away from the drilling area.
Q: How do I prevent overheating of the drill bit?
A: Keep the drill bit moving while in contact with the material. Applying excessive pressure can cause overheating, leading to damage.
Conclusion
Using a drill is a fundamental skill for any DIY enthusiast or professional. By understanding the components of a drill, selecting the right drill bit, and following the step-by-step process we’ve outlined, you’ll be well-equipped to tackle any drilling project. Remember to prioritize safety and precision for the best results. Happy drilling!

As the CEO of BestDrillPressforMetal.com, I take immense pride in our unwavering commitment to transformation and excellence in metalworking. I am driven and passionate about creating the best possible user experience for our customers and helping them achieve their goals with precision and innovation. With my guidance, we have established ourselves as a leader and trusted partner within the industry by leveraging cutting-edge technologies to push boundaries with incredible products that exceed expectations. We understand that metalworking is more than just a process; it is an art form made real through passion, dedication, and diligence—all of which embody our core values at BestDrillPressforMetal.com.


