
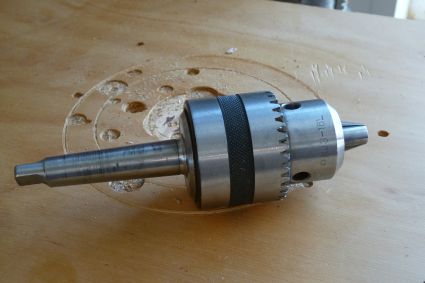
If you own a drill press, knowing how to remove and reinstall a drill press chuck is a valuable skill to have. Whether your chuck becomes defective, bent, or improperly installed, it’s essential to understand the steps involved in safely removing and reinstalling it. In this article, we will guide you through the process, providing you with the knowledge you need to keep your drill press functioning at its best.
Drill Press Chuck Removal Methods
There are several methods for removing a drill press chuck, each of which is easy and only takes a few seconds. Let’s explore two common techniques:
Using a Chuck Removal Tool
The easiest and most efficient way to remove a chuck from a drill press is by using a chuck removal tool. This specialized tool is designed to fit into a special access window on the spindle of the drill press. By hammering the chuck removal tool into the window, you can push the top of the chuck spindle down, loosening its taper fit and causing the chuck to fall out.
Here are the steps to follow:
- Insert the chuck removal tool into the press’s spindle window.
- Lightly hammer the chuck removal tool further into the window until the chuck falls out of the press.
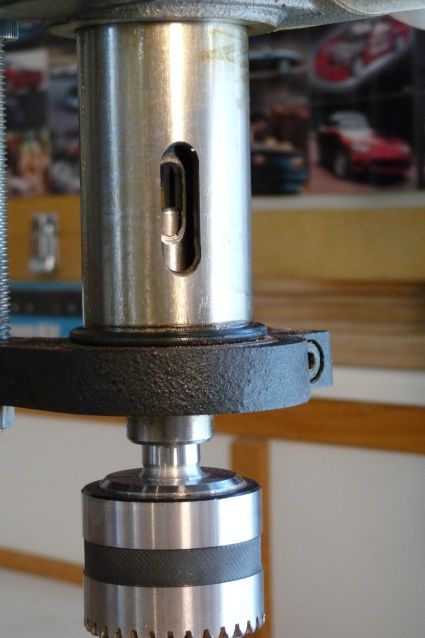
Make sure that the drilling table is raised enough to prevent any damage to the chuck during its removal. If you don’t have a chuck removal tool, don’t worry. There’s an alternative method you can use.
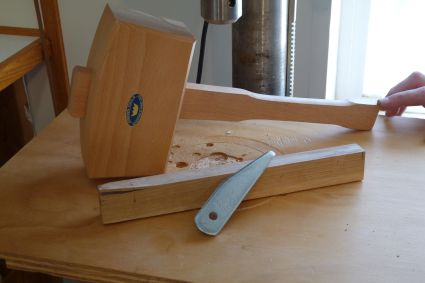
Hardwood and Hammer Method
If you don’t have a chuck removal tool available, you can still remove the drill press chuck using a hammer and a piece of hardwood. While this method may seem less refined, it can be equally effective if done properly.
Follow these steps:
- Get a hammer and a strong, usefully-sized piece of hardwood.
- Position the hardwood above the chuck at an angle.
- Using the hammer, strike the hardwood firmly a few times, and the chuck should fall right out. Ensure that the force of the hammer strike is angled downward to avoid damaging the chuck shaft or drill spindle.
Cleaning and Reinstalling the Chuck
After removing the chuck, it’s essential to clean it before reinstallation. Any oil, dirt, or debris on the chuck shaft or in the drill spindle can compromise the chuck’s hold in the press.
Here’s what you need to do:
- Clean the spindle of the chuck using a rag and a degreasing agent. Acetone is a great option as it evaporates quickly. Also, clean the inside of the spindle with a rag and some acetone.
- Once the shaft and spindle are clean, firmly insert the drill chuck into the press, ensuring it stays in on its own for a moment.
- Retract the jaws of the drill press chuck to prevent damage.
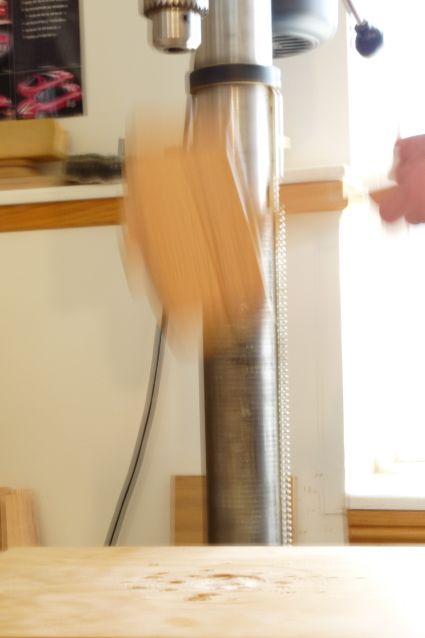
- Lower the press table to create enough space for hammer swinging.
- Using a wooden or rubber mallet, strike the bottom of the chuck quickly and forcefully two or three times.
The Morse taper design may seem simple, but if done correctly, this easy installation process will ensure that the chuck remains firmly engaged in the spindle until you intend to remove it.
FAQs
Q: Can I use a regular drill chuck on a drill press?
A: No, regular drill chucks are not compatible with drill presses. Drill press chucks have specialized Morse tapers that fit tightly into the identically-tapered spindles of drill presses.
Q: How often should I clean my drill press chuck?
A: It’s a good practice to clean your drill press chuck periodically, especially if you notice any dirt, debris, or oil buildup. Cleaning it regularly will ensure optimal performance and longevity.
Q: Do I need any additional tools to reinstall the chuck?
A: No, once you have cleaned the chuck and followed the reinstallation steps outlined above, you should be able to secure the chuck back into the drill press without any additional tools.
Conclusion
Now that you know how to remove and reinstall a drill press chuck, you can confidently tackle any chuck-related issues that may arise. Remember to follow the appropriate method depending on the tools you have available. By cleaning your chuck and reinstalling it correctly, you can maintain the performance and reliability of your drill press. For more information and expert advice on drill press maintenance and parts, visit Best Drill Press For Metal. Happy drilling!

As the CEO of BestDrillPressforMetal.com, I take immense pride in our unwavering commitment to transformation and excellence in metalworking. I am driven and passionate about creating the best possible user experience for our customers and helping them achieve their goals with precision and innovation. With my guidance, we have established ourselves as a leader and trusted partner within the industry by leveraging cutting-edge technologies to push boundaries with incredible products that exceed expectations. We understand that metalworking is more than just a process; it is an art form made real through passion, dedication, and diligence—all of which embody our core values at BestDrillPressforMetal.com.